Right off the jump, let me tell you: the title is misleading. This isn’t necessarily how YOU can flash YOUR 3D printer’s firmware. This article is more like a note-to-self kind of thing reminding ME of how i can flash MY printer’s firmware, because i am liable to forget by the time i have to do it again.
i’m also putting this into words in case it helps some poor soul out there who, like me, wants to complete the relatively simple process, but is bogged down by bad directions written by complete nerds who like to pull up the ladder and make things as complex as possible, and whose passive-aggressively scant documentation drips with disdain. This is not a difficult thing to do, but you wouldn’t know it. Thanks for nothing, nerds.
i am indebted to a kind soul named Alexander on the Anycubic Facebook group who walked me through this. Because i 98% don’t know what i’m doing, this step-by-step guide is offered as-is. If you run into problems, i won’t be able to help you. But hopefully, this is enough to get you farther than you were when you Googled and discovered this blog post in desperation.
My Setup
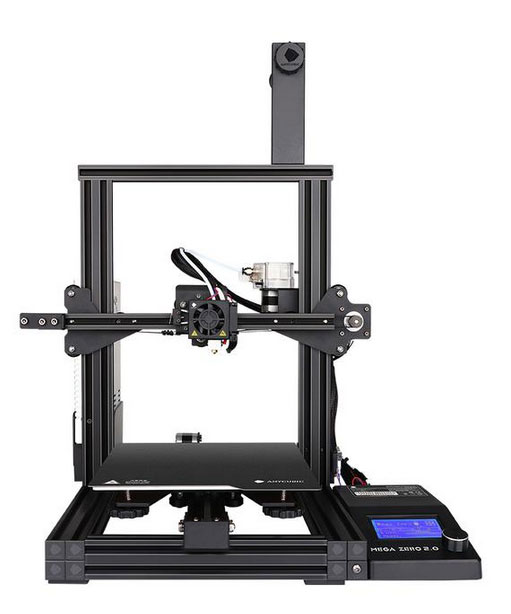
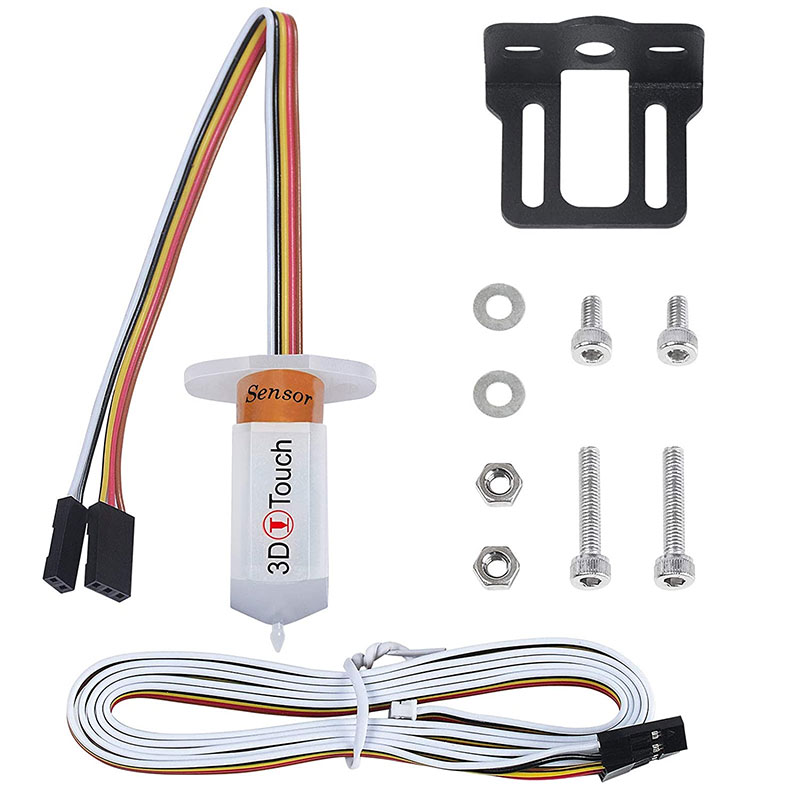
Here’s my situation: i own an Anycubic Mega Zero 2.0 FDM printer. It’s inexpensive and entry-level, and as a result, lacks a lot of bells and whistles. One of those missing bits is a self/auto-levelling sensor. The sensor is called a BL Touch if you buy it from its creator, Antclabs, but you can also buy a knock-off clone called 3D Touch from various skeezy Amazon vendors and save a few bucks. Since i’m chronically underfunded and i generally make bad decisions, i bought the clone.
The BL Touch/3D Touch is a little probe, kind of like a tongue, that “licks” your printer bed like a frog or a chameleon, and reports back to the printer how far away the bed is. You can level the Anycubic Mega Zero 2.0 on each corner using four dials, but what happens if your bed is slightly warped in places? Even a discrepancy of a few tenths of a millimetre can mess up a print.
The problem is that the printer’s firmware – the code (instructions) on the machine that tell it how to operate – doesn’t support this sensor out of the box. You need to go get a re-written chunk of code, and somehow send it from your computer to the printer, overwriting the original firmware. It requires installing a few things and downloading a few things, and then clicking a button. No biggie. Let’s go.
Finding the Cable
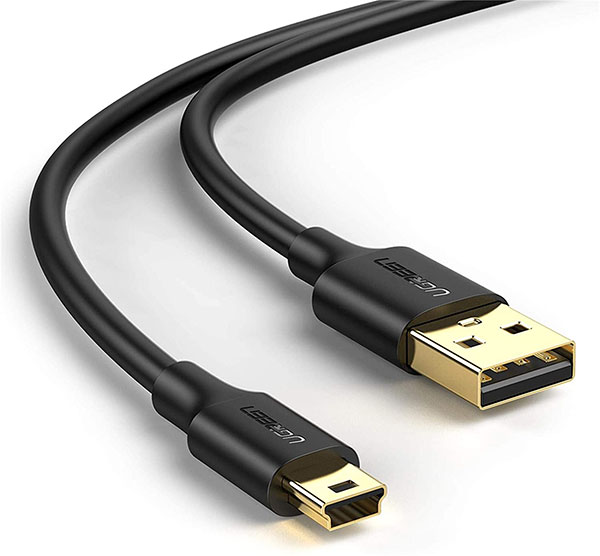
Your computer needs to be able to “talk” to your printer. Some printers have cable-free communication as a feature. Mine doesn’t. i can’t remember if the Anycubic Mega Zero 2.0 came with the proper cable or not, but here’s what i needed to scrounge from one of the cable bins in my basement crawl space. One end is USB type A, and the other is USB mini B, in case you’re looking for one on Amazon. Make sure you get one that’s long enough! Plug the mini B end into the printer, and the A end into your computer.
Securing the Driver
A driver is a piece of code your computer uses to interface/control/talk to/understand a piece of connected hardware. Your computer may not understand your printer off the jump, so you need to install a driver to help it out.
The ch340 is the driver you need. If it doesn’t automatically install when you connect your printer for the first time, Sparkfun has a good tutorial on installing the driver. Or Google ch340 driver for more help.
Downloading All the Firmware
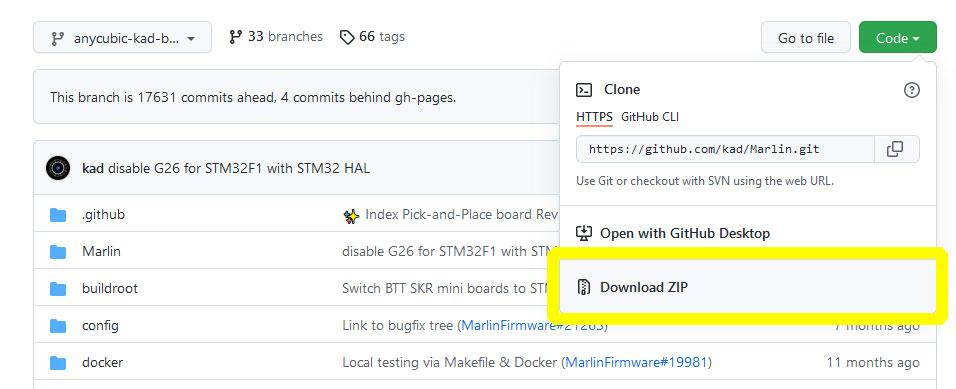
Next, you need to download this zip file that contains all kinds of different configurations of a firmware flavour called Marlin. The firmware has been rewritten and tweaked six ways from Sunday for all kinds of different printers and features. Extract the file to a folder somewhere on your computer.
Installing the PlatformIO Compiler
The code in the file you just downloaded and extracted is in its “uncompiled,” human-readable form. When you compile code, you tell a program to convert it to a machine-readable format. So you need a piece of software that will compile the code for you so that your 3D printer can ingest and understand it.
This is where the process went off the rails for me. You might find a lot of stuff about Arduino and instructions saying “If you have [any operating system except Windows], it’s as easy as typing this simple command into your shell!” or whatever.
Here’s what ultimately worked for me. Download and install PlatformIO IDE. PlatformIO is the thing that’s going to compile the code for you. You can get it as a command line tool, but i personally despise CLIs. God gave us buttons. Let’s use them.
So this thing sits on top of a free code editor from Microsoft called Visual Studio Code. Per the instructions on the site, you have to download and install Visual Studio Code first, and then follow the instructions to install PlatformIO as an add-on.
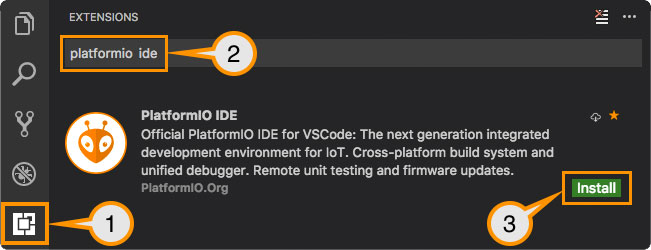
Selecting the Correct Firmware
Once you have PlatformIO installed and running, select
File>Open folder
and choose the folder where you extracted all of the firmware files from the GitHub zip in a previous step. This gives you a big long list of different firmware configurations to choose from. You’ll be selecting one, compiling it, and shipping it off to your printer through the USB cable to overwrite the existing firmware.
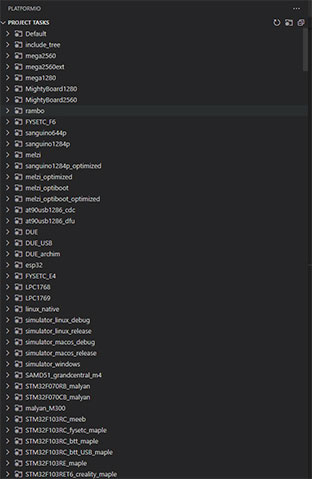
SO MACH FIRMWARES!
Which firmware do you choose?
In my case, i needed to scroll way down and select the one called anycubic_mega_zero2_melzi_bl_a2_zmin
“Melzi” is the name of the stock ciruit board installed on my printer. The Anycubic Mega Zero 2.0 is my printer’s brand name. “BL” indicates that changes have been made to accommodate the BL Touch hardware (and hopefully the 3D Touch clone hardware!) As for a2 and zmin, i don’t know. Maybe you can tell me in the comments? i gather zmin means that a certain pin on the board (the one the sensor plugs into) has been enabled.
i can’t help you with which firmware you need for your particular printer or goal. But once you figure that out, here are the next steps:
Click the firmware, and it opens a list of options below.
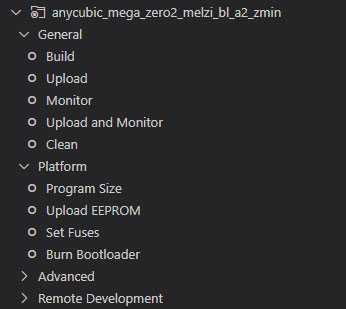
Click “Build”

PlatformIO ticks away, compiling that firmware for you. If it finishes without any errors (check the report in the bottom right window, in the “Terminal” tab), then you’re good to go. If you get errors, i can’t help you. Many sorries!
Once the firmware has successfully compiled, click Upload to shoot it over to your printer.

Again, watch the bottom right window, Terminal tab for progress. And if you get errors, i have no idea…. except this one:

i Googled it, and it turns out that if some other program is listening to the COM port that your printer is using, this process will fail. In my case, i just had to close Cura (my slicer software) and click Upload again to get it to go.
And then i ran into one more snafu: i had printed Alexander Kanevskiy’s 3D/BL Touch mount from Thingiverse. Alexander was kind enough to provide a picture of where to plug the sensor into the board, with labels and everything, but was not kind enough to mention that the Pin27 Adapter is a separate piece of hardware that you have to order.
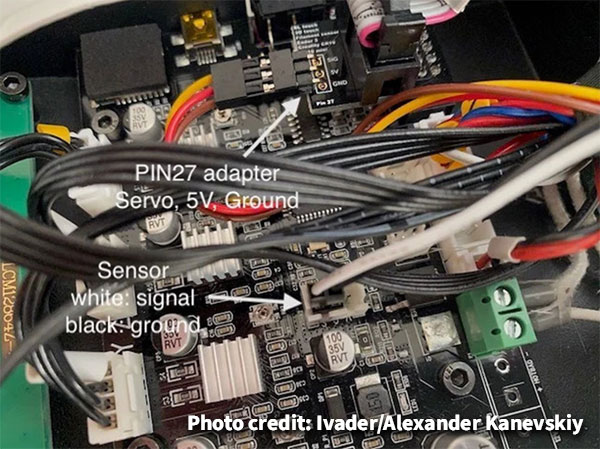
So i had to retrace my steps and get rid of the touch sensor firmware and restore back to the unmodified vanilla firmware, until i could get my hands on one of those adapters. (Amazon predicts weeks of waiting, here in Canada. Sigh.)
To restore the firmware, i followed the same Build/Upload process as above, after choosing anycubic_mega_zero2_melzi as my firmware.
Installing a BL Touch/3D Touch
i’d love to take you all the way there and tell you how i got my Touch clone sensor working, but i’m not there yet. i know i’ll have to rely on this article when i do finally snag a Pin27 adapter, and i hope to God there’s no soldering involved. Whatever happens, i’ll write another article once i get it all working.

