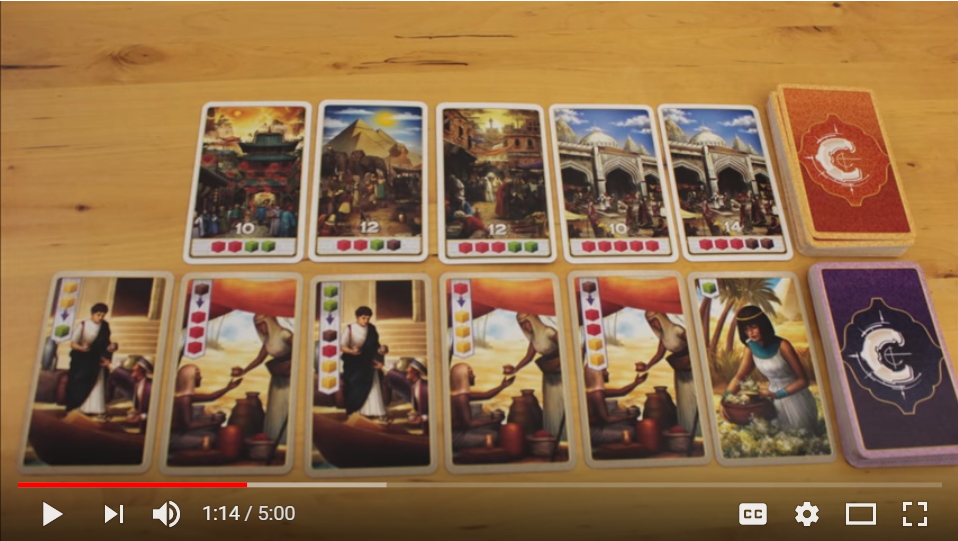
i’ve been making board game videos for a new channel called Nights Around a Table. The majority of my shots are aimed down at the table, as i stop-motion the cards and pieces around while explaining how to play. For the first three videos, i accomplished this by putting my tripod right up against the table, and cranking the camera angle down as sharply as i could manage it, but i still end up with sort of a 3/4 view down at the table:
The tripod gets in the way with this setup, and i’m constantly at risk of bumping it and ruining a complex stop motion shot. i wanted to be able to shoot straight down with the camera up and out of the way, leaving nothing up space for me to manipulate the pieces. Should be easy, right?
… r-right?
Brokeback Tripod
At first blush, i thought this Manfrotto tripod would do the trick. (Manfrotto is a brand name that would come up later in my search, with a vengeance.)
This fancy tripod has a horizontal bar that extends up and out of the body, for shooting straight down. But i was underwhelmed by the length of the bar (i wasn’t sure it would extend far enough across my table) and especially the price of the tripod, at over $300 here in Canada.
C is for Costly
The first don’t-pay-$300 solution i happened upon was in this video where the guy recommends building a sort of goal post across your table, suspending a piece of wood between two “mini C-stands”:
“What the heck is a mini C-stand?” i wondered. i didn’t even know what a maxi C-stand was, but i DID know what a piece of wood was, and i liked this guy’s DIY solution and the whole “just use a 1/4″ bolt from the hardware store approach.” So off i went to the hardware store to buy my piece of wood and my bolt and washer. So far so good!

The issue here was with those mini C-stands. The “C” in C-stand stands for “century” (and i won’t stand for it, Stan!) A C-stand is a standard piece of studio grip equipment that lets you position lights and other doo-dads. They’re pretty heavy duty. And like they say in Jurassic Park, if it’s heavy, then it’s expensive. So put ’em back.
This link above is from Amazon.com. Here in Canada at Amazon.ca (or at finer camera stores in the Great White North), a C-Stand sells for around $200. So my seven dollar hardware store DIY wood-and-1/4″-bolt project was now north of $400. This would not… stand.
The Cut of My Jib
My 40th birthday was coming up, and my mom assured me that she’d spring for a better-than-average present because it was a divisible-by-ten birthday. i thought maybe one of these camera jibs would do what i needed it to do:
(By the way: you don’t know what you don’t know. Even figuring out that this thing was called a jib took significant research)
i didn’t get the particular jib pictured above, but something like it. It shipped in a bag with no instructions on assembly or usage, and it had the feel of having been opened and returned by a half dozen customers before me. The aura of a sad factory somewhere in China clung to it.
The Amazon product image didn’t show the camera being mounted to the underside of the jib, but i figured i could jury-rig it into that position to shoot down at my table. The bigger problem was that the tripod wasn’t included with the jib. i don’t actually own a “real” tripod … in fact, this experienced marked the first time i realized there even was such a thing as a “real” tripod. A tripod used by pros has a detachable head with a 3/8″ threaded screw interface (remember this: it’s important. i didn’t.) i “only” own two consumer grade tripods that are… you know, like three legs and a place to stick the camera. Silly me!
So after bending this crane to my dark purposes and weighing it down with a sandbag (not included), i needed to attach it to the fancy tripod that i didn’t own. i broke the news to my mother, who graciously returned the jib to Amazon.
All Hardware
With the jib on a slow boat back to China, i found what i thought was a great solution: a lady on YouTube had a video outlining how she built a goalpost-like structure over her table using an all-hardware solution. PVC pipes and gaskets, all totaling maybe 30 bucks in supplies. i can’t for the life of me find her video, but the resulting gear was similar to what this guy cooked up:
The crucial component was a clamp that the lady recommended. The clamp grabs on to a tube-like structure, and has a 1/4″ thread for attaching your camera.
This made a lot of sense to me, and seemed within my reach. It wouldn’t be adjustable, like the C-stand solution was, so i’d have to make sure i built my frame to the correct height above the table.
Meanwhile, mom was asking me what she could replace the camera jib with. She threw me some Amazon points, and i picked up one of these:
So this is just a big metal frame that you clip some muslin to, so you can have a black or white background, or a green background to chromakey yourself (probably cheesily) into any setting.
i haven’t tried the green screen yet, but i know from watching enough bad home green screen that the trick is getting the background really smooth and flatly lit. To that end, i picked up some extra clamps:
… and these velcro ties, which help you stretch your fabric taut:
Someone on Amazon mentioned that the few measly clamps that shipped with the backdrop were insufficient. When everything arrived, the tons of extra clamps seemed like overkill, but they’d play an important role really soon.
It was only after i set up the frame that a realization dawned on me: this backdrop thing was a goalpost-shaped apparatus. This was my overhead rig!
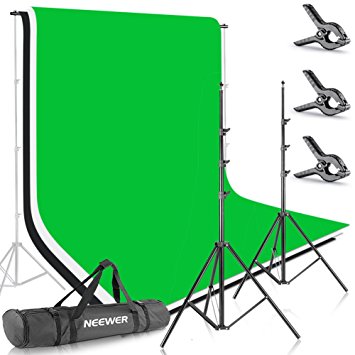
Clamp your Hands!
When you’re shooting down at the table, you don’t need a backdrop. My how-to-play board game videos have two shots: me (with a backdrop) and board games, looking down at the table. It was perfect. “PER-FECT,” i cackled, like a mad scientist. Outside the window, lightning flashed.
In my enthusiasm (and not being able to find the lady’s video to see which clamp she recommended), i ordered this thing:
When it showed up, i was surprised at how small it was. All my fault, too: Amazon clearly states the circumference of the clamp, and the description says you can attach it to lighting gear. Being completely new to all this, i didn’t realize that lighting stands were significantly thinner than the poles comprising the green screen backdrop frame. i sent this clamp back sheepishly, and looked for something else.
Spendlotto
“Manfrotto” is a name you may not know if you don’t do any photography. i hadn’t heard of them until i looked into shooting better videos. These guys appear to make the best – and most expensive – gear around.
Somewhere, a pro photog is laughing at me. i’m sure you can pay more than Manfrotto, but for someone just getting into photography and video, you learn pretty quickly that a) yo shit’s basic and b) Manfrotto makes the good stuff, and likely c) you can’t afford it.
All of the clamps i found on Amazon were for attaching lightweight gear like GoPro cameras to BMX handlebars and what-not. i needed to attach my DSLR which, while not hugely heavy, was certainly heavier than what these clamps were rated to handle. i needed something more robust. i needed something by Manfrotto. i needed… a Superclamp.
This thing ships with a threaded 1/4″ brass pin sticking out of it that you can screw your camera onto. Great! It would obviously be large enough to attach to my backdrop frame/overhead rig. But upon further reading, i realized that a DSLR shouldn’t be screwed directly onto a pin like this, because the camera is still too heavy, and the bottom of it could crack. That’s why you generally screw your camera onto one of those flat quick-release plates with the 1/4″ screw sticking through the middle:
The last thing i needed during this whole quest was to crack the bottom of my camera. So i looked into what i needed to interface with the Superclamp.
Ball Head
Keenly feeling inadequate because i didn’t own a “real” tripod, i happened upon another piece of Manfrotto equipment that showed up so often in my research, that it struck me as likely an essential piece of gear:
This is a nice ball-and-socket joint to finely position your camera and lock that position into place. It would attach to the brass pin on the Superclamp (which was slowly en route to my house). Because the backdrop and clamps were a gift and i had only purchased the Superclamp so far, i thought i could take the plunge and spend the bucks on the ball head. So i did.
Insufficient Stud Girth
When the Superclamp arrived, i realized my error: the brass pin had a 1/4″ thread, but standard tripod interface for non-n00bs was 3/8″. Crapdammit! i needed a new pin. Of course, Amazon was happy to oblige. At this point, i thanked my lucky stars i was a Prime customer, or else this entire process would have taken a year. i ordered the 3/8″ pin, and it arrived just over a day later:
The brass pin was the laaast piece in this complicated puzzle. Here is the finished clamping gizmo completely assembled at last!
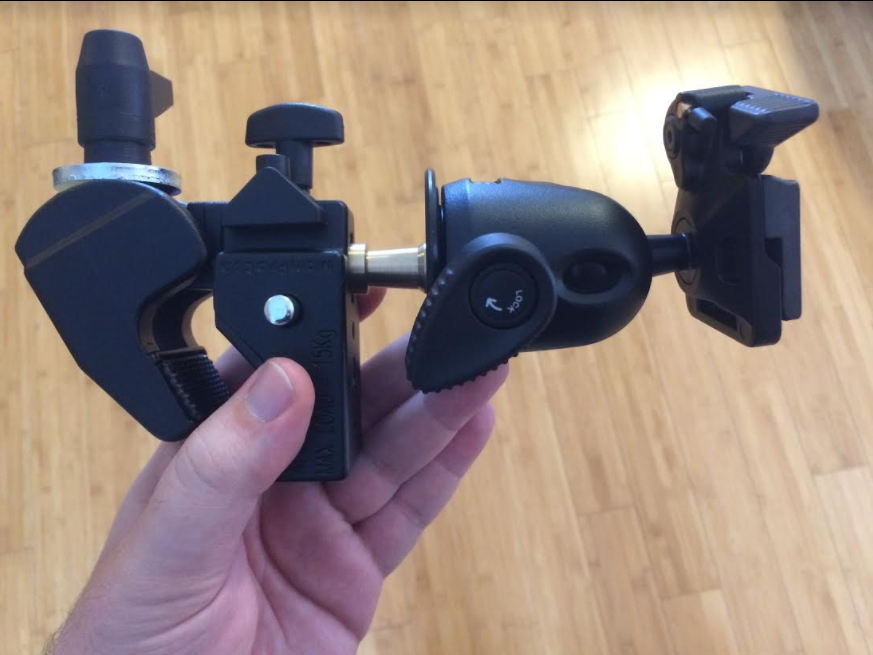
Man oh man. So glad to finally have what i need. It feels like i’ve been slowly assembling Voltron over the past month.
The irony is not lost on me that this is not a particularly professional-looking photo. It’s a poor workman who blames his tools.
Wild Gooseneck Chase
The Superclamp solution will serve me for How to Play videos, where the pointed-at-Ryan an pointed-at-table shots are taken during completely different shoots. But what about the unboxing videos i want to do, where i need TWO cameras pointed simultaneously at both me and the table?
That, i’m happy to report, was a simple solution, and i had almost everything i needed.
i popped into an adorable Japanese IKEA called Miniso, and found a gooseneck iPhone holder for about five bucks! Here’s a slightly pricier one from Amazon:
It’s clipped to my drop ceiling. Those extra clamps help keep the cords out of the way:
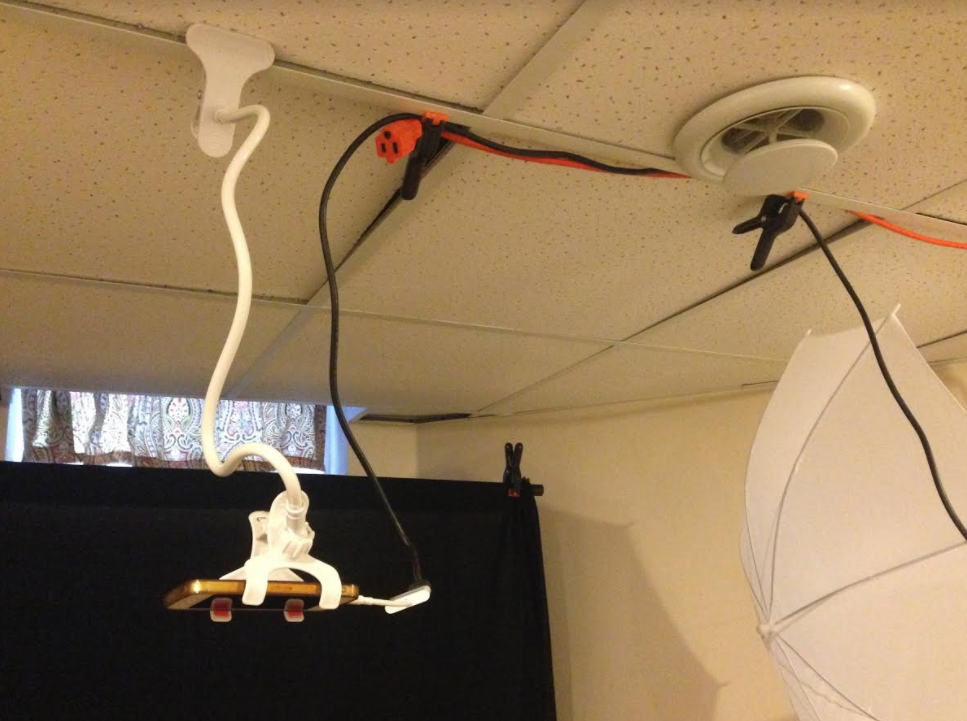
i have an adapter that lets me see the shot on a nearby monitor. i’ve taped off the table so that i know where the edges are:

Pretty boss, right?
Money Hardly Spent
Hard to follow? Here’s a handy chart of what i purchased, what i returned, and what (through the magical power of PRESENTS) i managed to pay in order to shoot straight down.
To YouTube!
Now that all this Amazon hustlin’ is done, i have everything i need to make the very best board game videos nobody asked for.









Trackbacks/Pingbacks